(A similar article for power board MLT186B is available here.)
This post should help both those who wonder if their AKAI (or ILO) TV is dead because of the power board or the main board as well as those who receive a serviced power board from us and think it was not properly serviced.
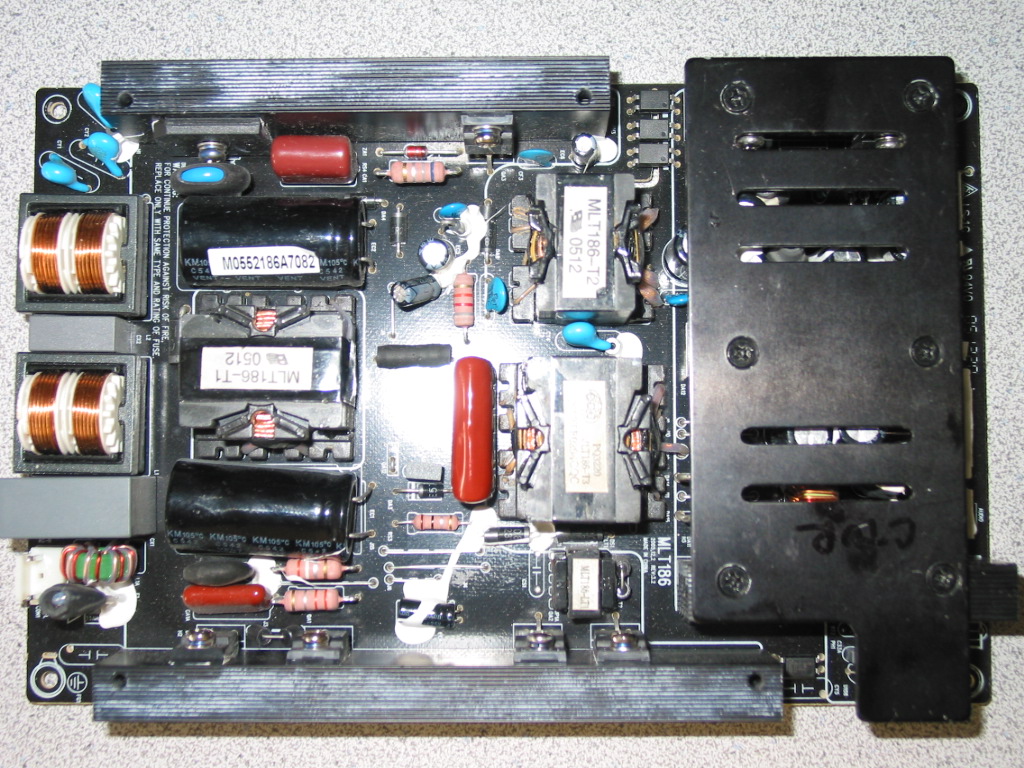
MLT186 is relatively simple as far as power boards go. It produces one standby (always on) output voltage of 5V and, upon instruction from the main board, activates another , more powerful chain of the board, which produces additional channels of +5V, +12V and +24V.
All voltages are DC and all measurements are made with a multimeter in VDC measuring mode (dial pointing to VDC or V= sign), black probe touching any of the GND outputs or, if the board is mounted in a TV, any metal part of the chassis.
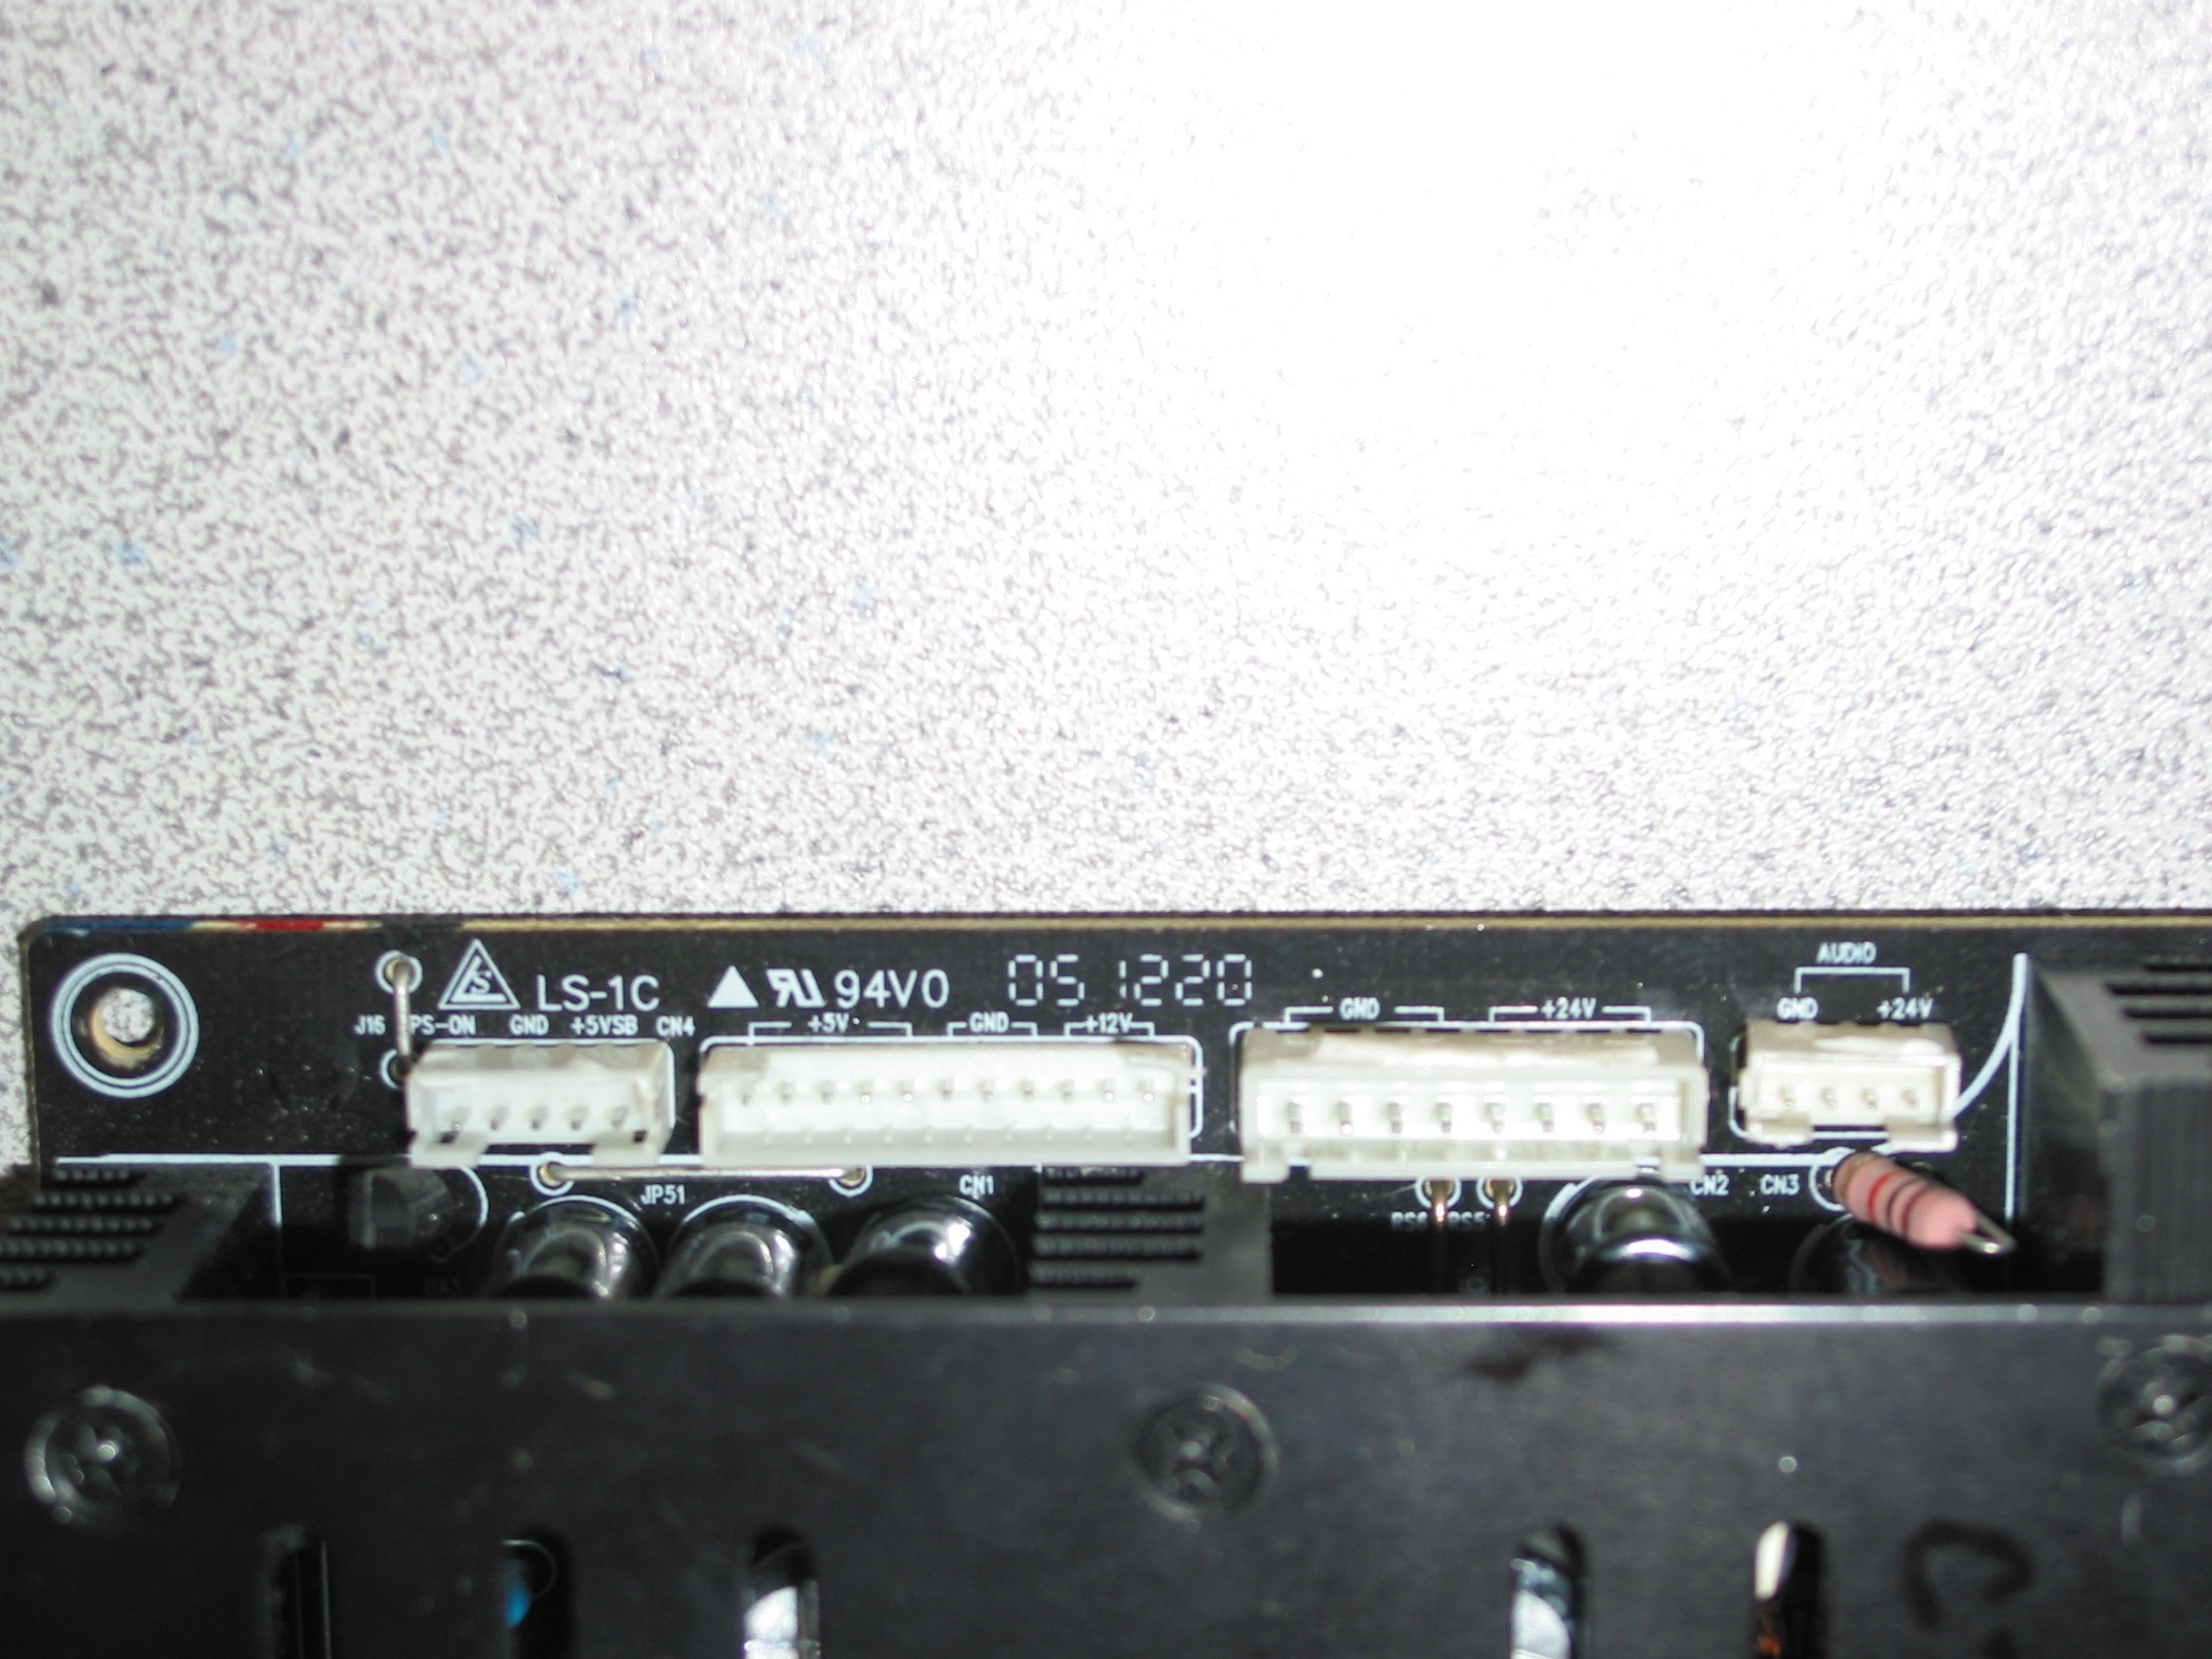
On the picture above (click to see it larger) you have the four connectors (CN4, CN1, CN2 and CN3) with the labels indicating pin meanings as follows:
- On the first (leftmost) connector CN4: 1 x PS-ON, 2 * GND, 2 * +5VSB;
- On the second connector CN1: 5 * +5V, 3 * GND and 3 * +12V
- On the third connector CN2: 4 * GND and 4 * +24V
- On the fourth (rightmost) connector CN3: 2 * GND and 2 * +24V (power for audio amplifier)
It powers a small circuit on the main board, which is responding to the power button on the side and the remote control and when it detects you want to turn the TV off it sends back the +5V to the PS-ON pin on the same connector thus instructing the power board to wake up and get ready for work.
The first thing to test in any power board is the presence of this standby voltage, so using the multimeter in VDC (or V=, which is the same) mode, hold the black probe to any of the GND outputs and the red one to any of the two +5VDC pins on CN4.
A good test involves taking readings with both connector cables unplugged and then plugged; that can help determine if a power is working properly under load or failing to work under load.
We'd recommend testing everything here without any other cables connected to the board other than, of course, the main AC cable on the other side of the board.
Once the +5VDC voltage is there one needs to tell the board (signal it) to wake up the rest.
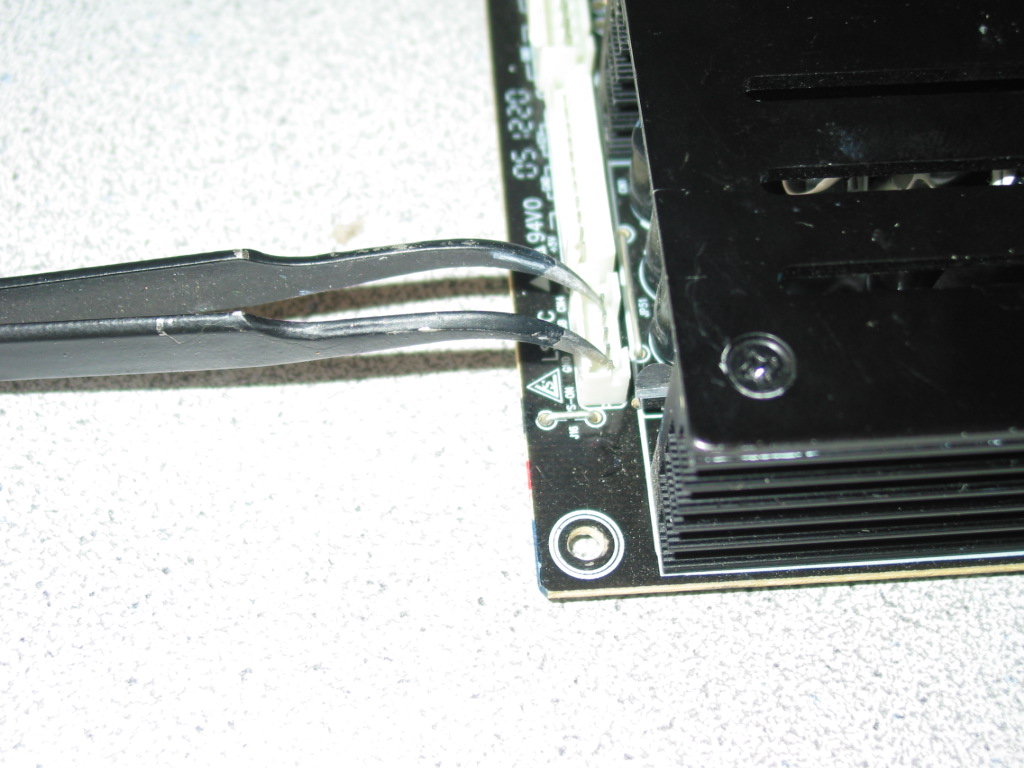
You can use the standard TV cable to do that or, if you're more handy, find a little jumper or, in our case, tweezers that can pass the +5VSB to the PS-ON pin as shown here:
If that's hard you can just use a little jumper to solder the two opposite pins of the connector on the other side of the board.
Once done, all other voltages should appear.
Note: audio output voltage may be +18V and not +24V as labeled on the board; that's OK as long as it is stable.


0 comments:
Post a Comment