As Terry Pratchett puts in in one of his brilliant books, the price for being the best is that you have to be the best. Modesty is behind getting the job done. (that is from me, not Terry Pratchett)
OK, down to business. Based on what I found I expect this to be a common problem with Carrier home AC systems and I hope this will help others in my position save time and money.
Problem likely affects all Carrier furnace located control boards 325878-751 - models HK42FZ004, HK42FZ007, HK42FZ008, HK42FZ009, HK42FZ011, HK42FZ016.
Those are used in HVAC system models 340MAV, 345MAV, 350MAV, 351DA, 373LAV, 376CAV, 383KAV, 393AAV, 395CAV, 480BAV, 481BAV, 490AAV, 58MCA, 58MSA, 58MXA, 58PAV, 58RAV, 58WAV, 58YAV, 58ZAV, GB1AAV, GB3AAV, PG8DAA, PG8UAA and PG9MAA.
I'll first give you the very short version and then the longer one with pictorial.
SHORT VERSION
Symptom: AC control panel is on, says "COOL ON" but no air blows anywhere in the house. Same with FAN ON. Outside unit (compressor) works when the "COOL ON" is displayed on the control panel (it is normal for it to NOT work otherwise).
Problem: Burned relay solder contact on control board 325878-751.
(of course the same symptom may be caused by other problems; this is the problem that I had!)
Resolution: Clean and re-solder the contact, cover with protective coating to prevent from happening again.
LONG VERSION
So the AC turns on (cold in my case) but no air flows anywhere in the house. As with everything I started on Internet and first read this article. You may read it as well, it's a simple and useful introduction.
I tried what was suggested there - resetting the system once - before you try other things, because I remember one time in the past when I paid AC technician $100 to do just that - reset the unit. Nor do you want to try to fix something that isn't broken in the first place...so try soft reset first!
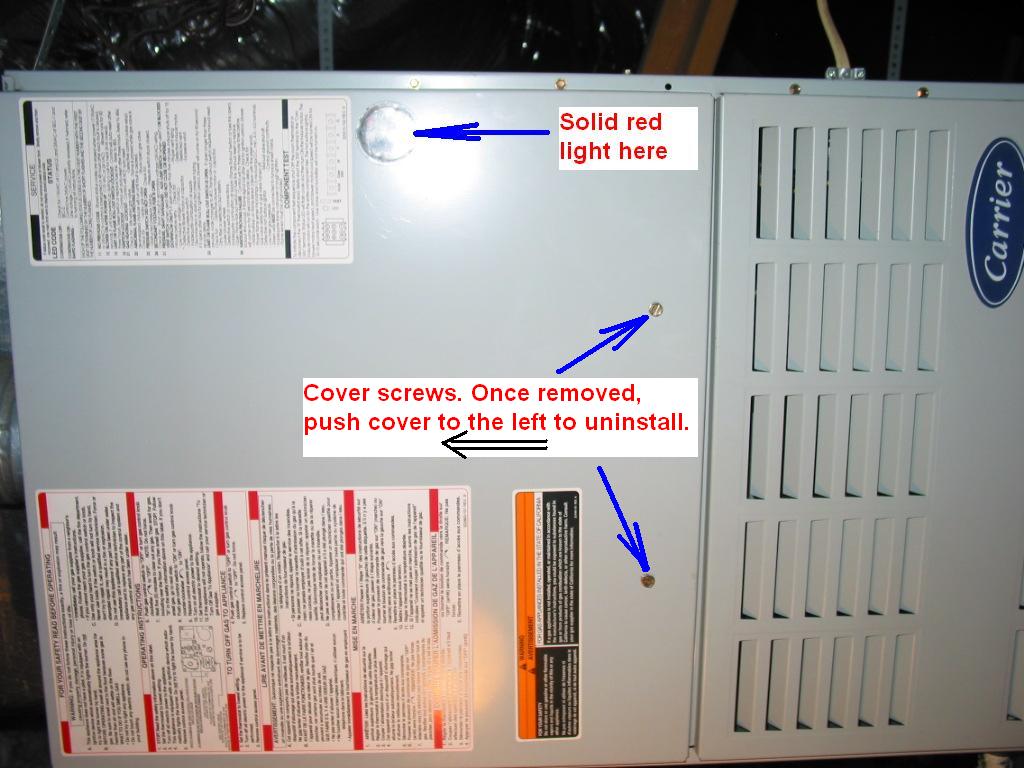
Once I established the outside AC works and the blower doesn't - even after reset - I took a closer look at the furnace. Here is what I saw:
Notice the LED light was solid red, indicating presence of 24V to the system and no errors.
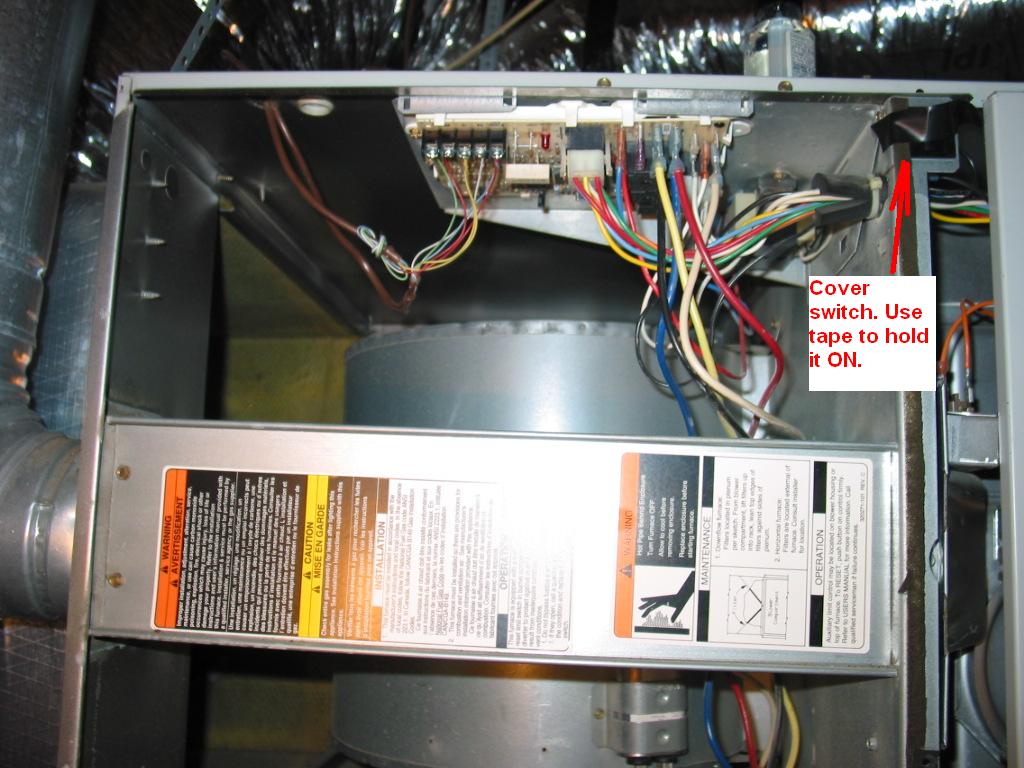
I took the cover off::
The cover switch at the upper right corner is used to automatically turn off the control board whenever the cover is taken out. You will need to use a tape to stick it in closed position and run tests, but remember that any later operations on the board better be done with the whole system turned off by this AND the main unit power switch (follow the furnace power cable to the switch).
One thing you will want to do is bring light up there in the attic as I did. Helps tremendously and pays the effort of doing it in the first minute you have it!
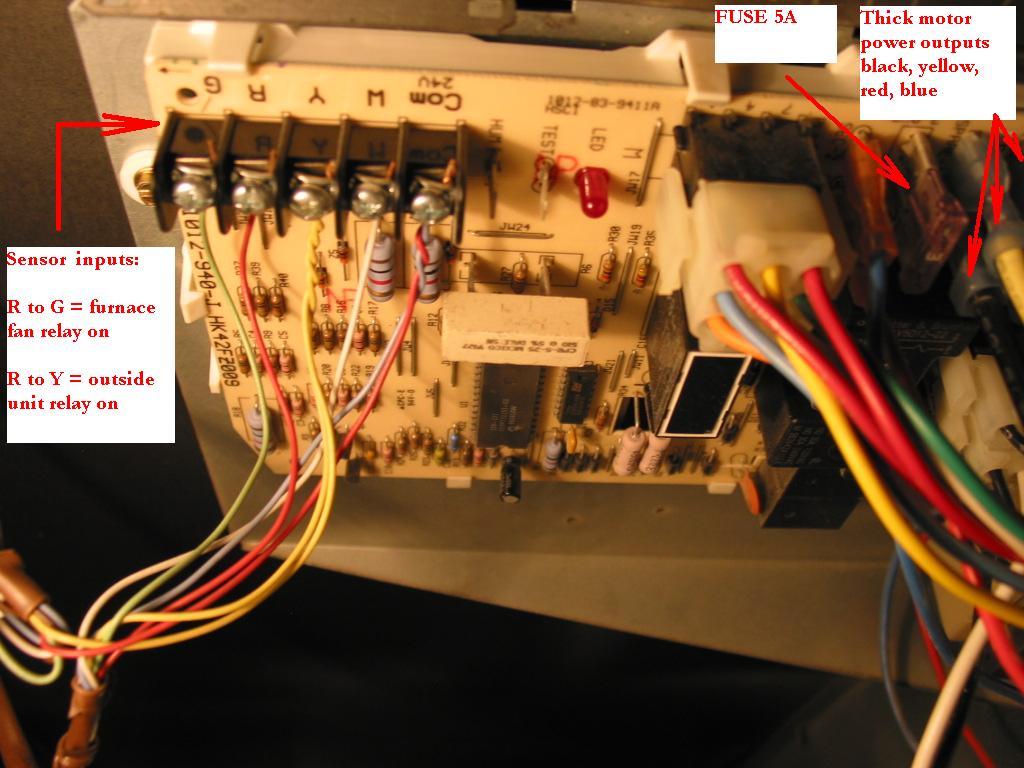
Let's take a closer look at the board:
On the left side you have the control/sensor connectors marked G, R, Y and W for the color of the wires that go to them. Last is the COM.
Also on this picture I am showing the board's fuse, which is worth checking before you do anything else. I mean that's what fuses are for, right?
Finally, you can look at the thick cables that go from the board to the motor. There are several of them because there are several different windings for different speeds of the motor. Only one of them is being active at a time though and they take simple 110V AC. There's a fifth (white) cable not shown in the picture, which is the common second connector.
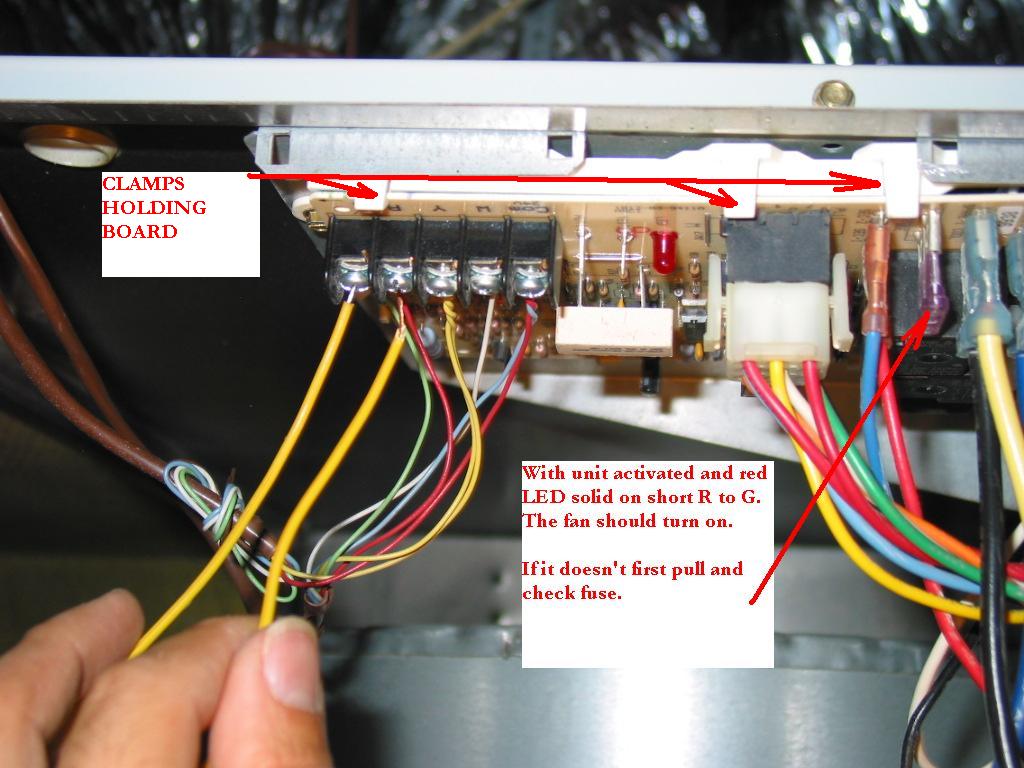
Now, to test the fan you should tell the board to close the relay that supplies it with power. You do that by shorting G and R on the board (the door switch must be taped in and LED must be solid red when you do it):
You should hear a relay click quickly followed by the noise of the motor in the back.
In my case, I could hear the click, but the motor never did a spin.
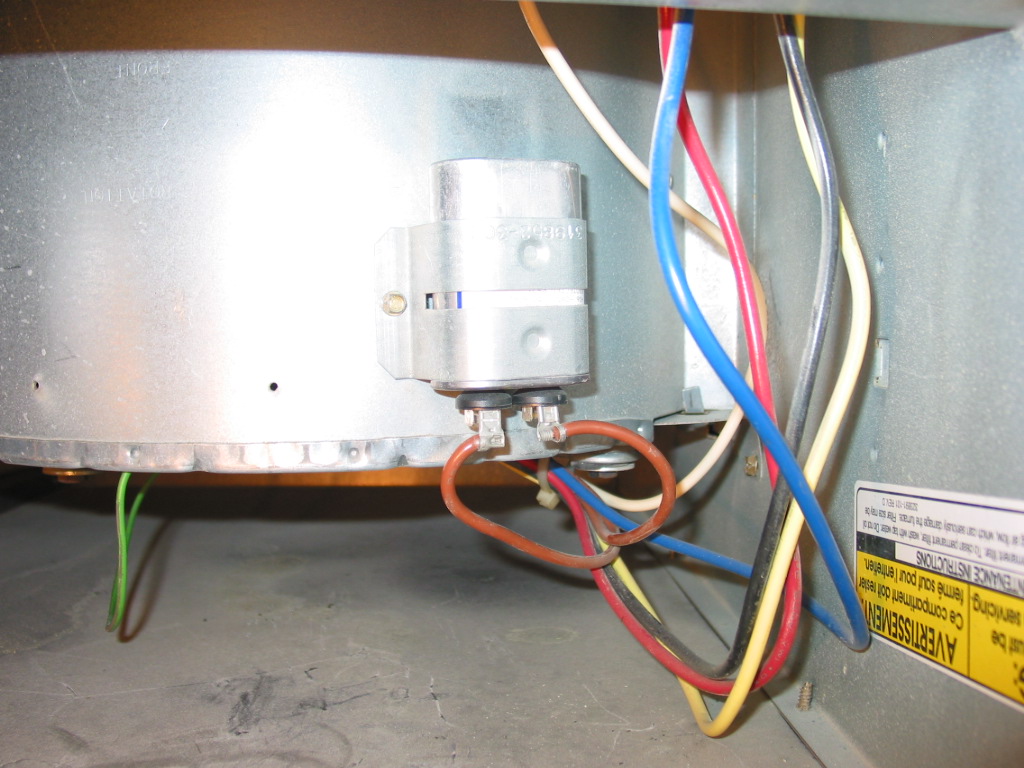
Now, from what I learned on Internet and what I first checked, one equally common problem that shows same symptoms is failed start capacitor on the motor. The start capacitor is located on the motor itself and looks like this:
I returned the capacitor in place and I was planning on directly passing 110V to the motor to test if it will spin when I decided to first take a look at the board due to something I had read about repeatedly failed solder joint. I have seen the exact same things in other power appliances such as laser printers and some large TVs and I figured it's easier to check this than trying 110V on a motor I have never seen before.
So after disconnecting the furnace from the master switch, I released the board clamps (see the above pictures) and gently pulled the board out. There was actually one black clamp different from the others. It was was holding the board stuck to the underlying (or, since it is upside down, above-lying) plastic base.
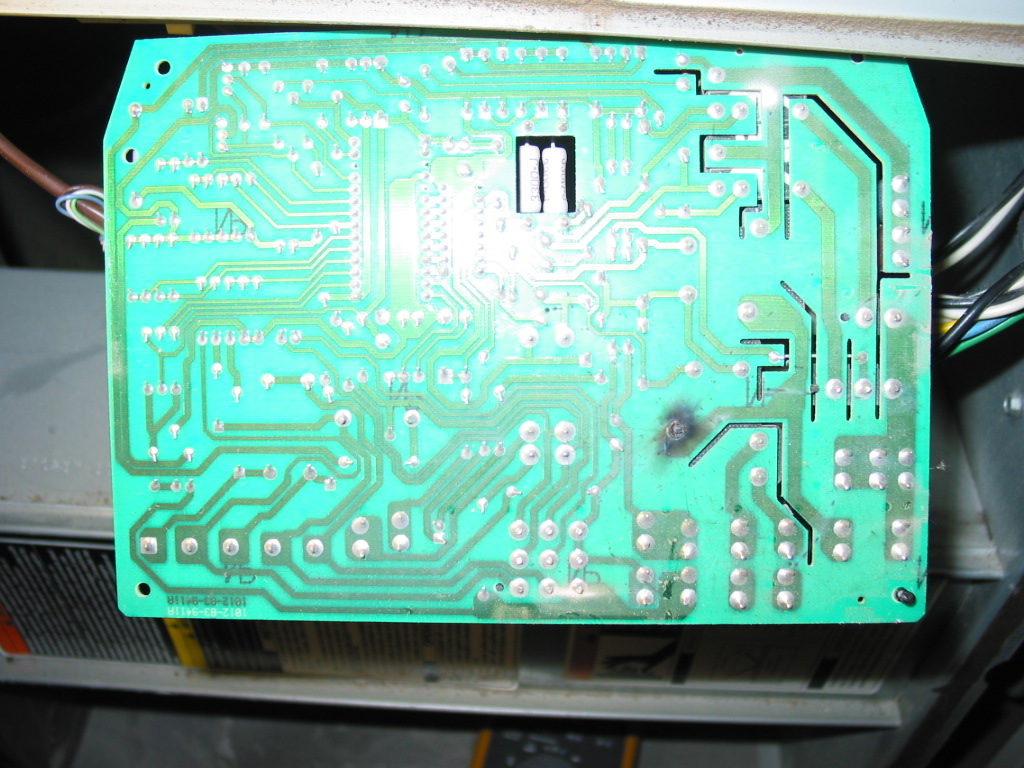
This clamp is located at the front right side of the board and I just gently pried it out with a large screwdriver. May not be the best way to do it, but worked for me and it should for you as long as you do not apply too much power.Once I pulled the board out I could immediately see the problem:
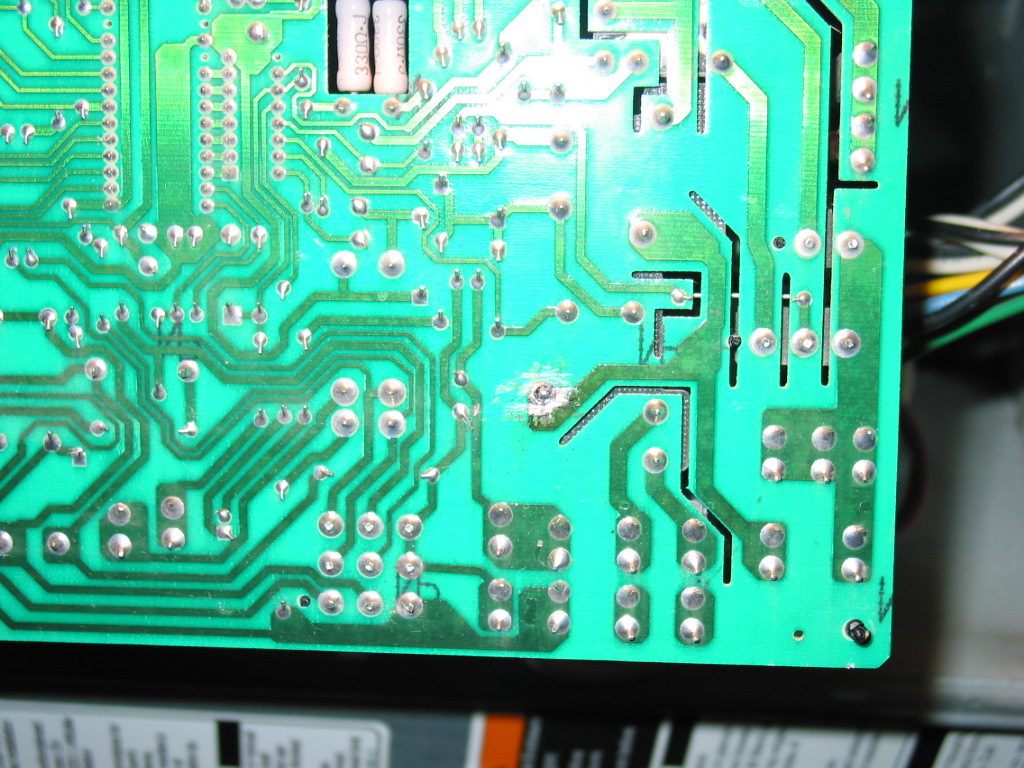
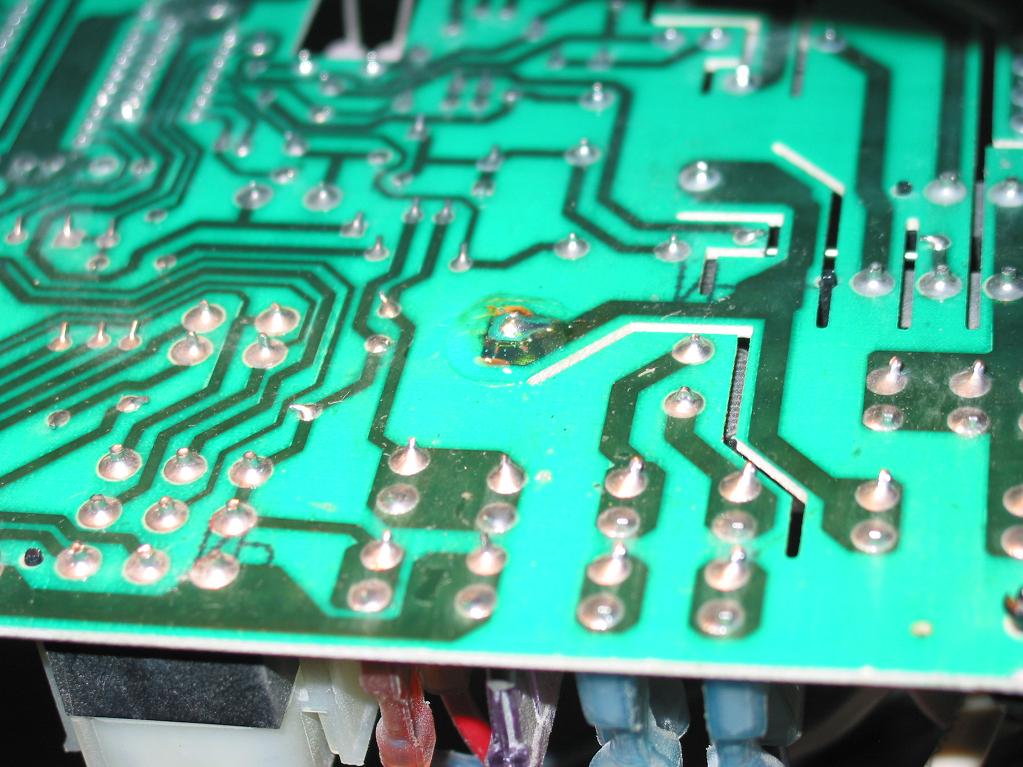
From here on it was very easy. Just clean with a small screwdriver or a knife, solder (with flux!) and, in my case, apply acrylic conformal coating on top of the solder to decrease chances from this happening again.
The next two pictures aren't too good to show that, but I'll add them anyway. I know Megan Fox is unlikely to ever pick me as a lead photographer for her photo sessions and if I can live with it so should you :)ADDITIONAL INFORMATION:
I thank to the people who had posted information that helped me solve this problem without paying any extra money. The very least I can do to honer their work is to point you to it:
1) http://www.askmehelpdesk.com/heating-air-conditioning/c-heat-does-not-work-w-thermostat-set-auto-77039.html
2) http://toad.net/~jsmeenen/motor.html
8 comments:
I really like this site. The way of presentation is very good.
With the amounts of info that it has posted here I will be sure to come back to it.
This post in particular I found very informative. I am sure that
Thank you very much for this post. Exact same issue with my Carrier furnace. Gave to the information and courage to fix it myself.
This was great, I needed a visual to place wiring back on board as I took apart on one day and a week later I am trying to put back together and forgot wiring
Accidentally came across this post and I suspect you just saved me several hundred dollars! Can't thank you enough.
I knew if I looked long enough I would find the problem. Thanks so much for the post. This unit is 17 years old and I didn't want to put any more money into it. So I resodered the connection, hopefully it will give me another year or two
thanks for sharing this is amazing blog Furnace Repair Scarborough
This Sad Shayari in English hits right in the heart. Sometimes, words can express the pain we hide so well. Beautifully written!
Very useful content for anyone interested in car sale. I’ll definitely share this with friends.Visit more:-perodua online booking Malaysia
Post a Comment